A wingback recliner is a comfy and stylish chair that many people love. But over time, the fabric can get old and worn out, making the chair look tired. Reupholstering your wingback recliner is like giving it a makeover. It means taking off the old fabric and putting on new fabric that you choose.
This can make your chair look brand new and match your room better. It’s a way to keep your favorite chair, but make it look and feel new again.
So, let’s roll up our sleeves and learn how to reupholster a wingback recliner, combining practicality with the joy of a satisfying DIY project.
Removal Of Old Upholstery: Wingback Recliner
Removing the Back, Seat Cushion, and Armrests
Before you can access the old upholstery, you’ll need to disassemble the different components of the wingback recliner. Start with the backrest, which may involve unscrewing it from the frame or removing any clips or hooks securing it in place.
Similarly, take apart the seat cushion, which might require unscrewing or unclipping. If your recliner has armrests, these should also be carefully removed.
Safely Taking Apart the Reclining Mechanism
Depending on the design of your recliner, you may need to disengage or detach the reclining mechanism. This is often done by removing screws or releasing clips.
Take note of the arrangement and placement of parts as you dismantle the reclining mechanism, as this will be crucial for reassembly later.
Tips for Dealing with Stubborn Staples or Tacks
Removing the old fabric and padding can be a time-consuming task, particularly if there are many stubborn staples or tacks holding them in place. Here are some tips to make this process more manageable:
Use a flathead screwdriver or needle-nose pliers to gently pry up staples or tacks. Be cautious not to damage the chair’s frame or foam underneath.
Work slowly and systematically, focusing on one section at a time.
If you encounter particularly stubborn staples or tacks, you may need to employ more force or use a staple puller tool for leverage.
Wear safety gloves to protect your hands from sharp staples or tacks
Reupholstering Wingback Recliner: Step-By-Step Instructions
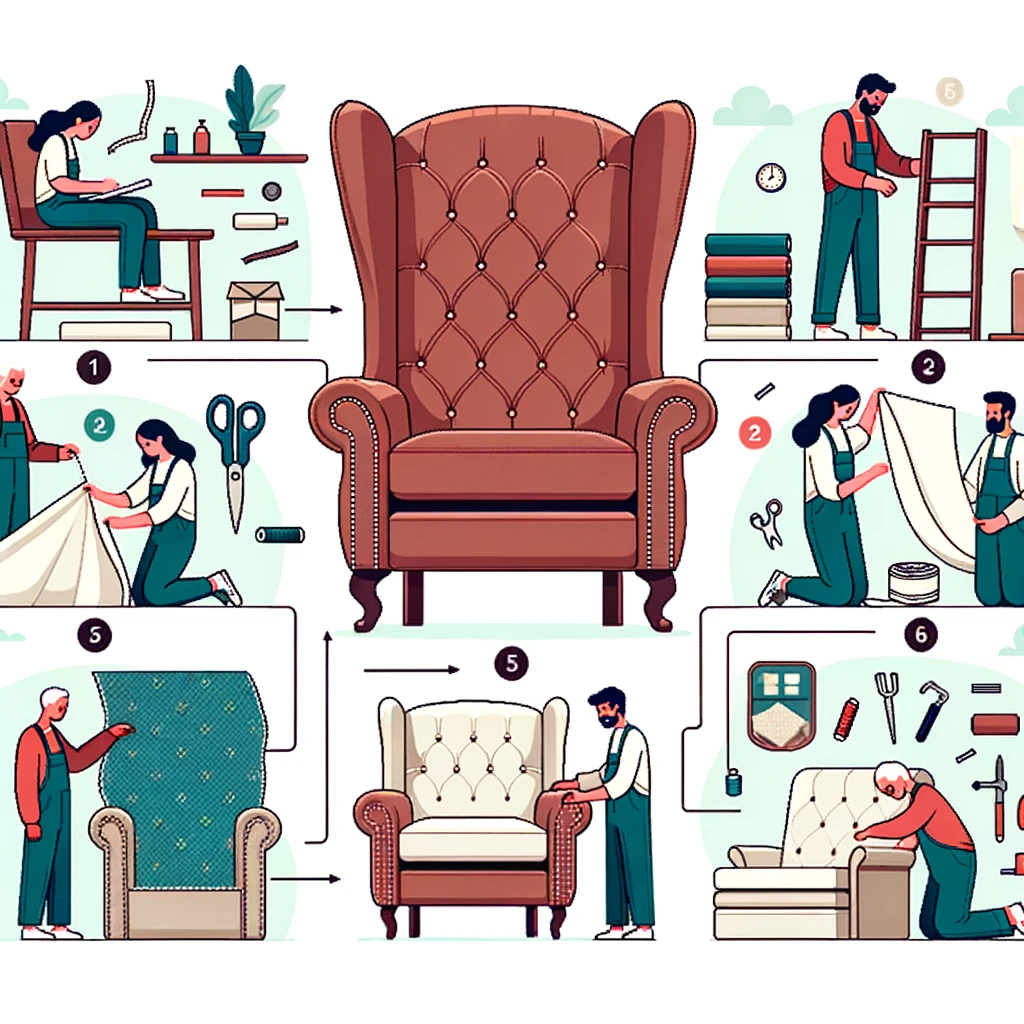
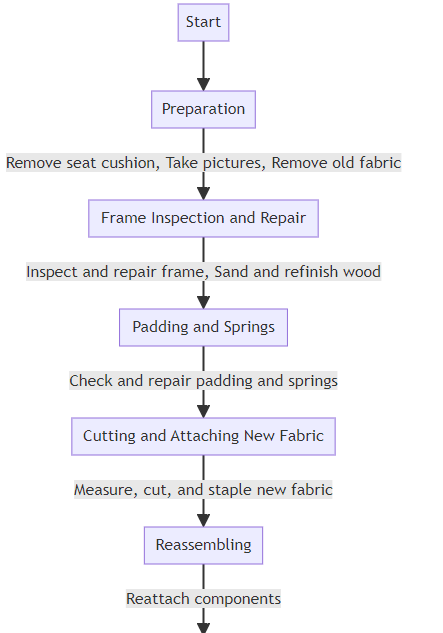
Step 1: Preparation
Make sure you have enough space to work on the recliner comfortably. Lay down a drop cloth to catch any debris or staples.
Ensure you have all the necessary tools and materials listed above.
Step 2: Disassembly
Carefully detach the backrest from the recliner frame. This may involve unscrewing it or removing any clips or hooks.
Depending on the recliner’s design, you may need to unscrew or unclip the seat cushion.
If your wingback recliner has armrests or other removable components, take them apart as well. Be sure to keep track of all screws and hardware for reassembly later.
Step 3: Remove Old Upholstery
Use a screwdriver and needle-nose pliers to remove any staples or tacks holding the old fabric in place.
Carefully peel away the old fabric and padding. Be cautious not to damage the foam or frame underneath.
Step 4: Repair and Reinforce
Inspect the frame for any damage or weak spots. Repair and reinforce as needed using wood glue, screws, or bracing.
Replace any worn-out or flattened foam padding with new foam. Cut the foam to fit the shape of the chair components (backrest, seat cushion, etc.).
Add batting over the foam to provide additional padding and smoothness to the upholstery.
Step 5: Upholster the Recliner
Lay out your chosen upholstery fabric, and use the old pieces as templates to cut the fabric to the correct size and shape for each component.
Starting with one section at a time, attach the fabric using a staple gun. Begin by stapling the fabric at the center of each side, pulling it taut but not too tight. Work your way outward, stapling along the edges.
Pay special attention to corners, curves, and folds, making neat and secure folds in the fabric as you staple. Trim any excess fabric as needed.
Step 6: Reassemble the Recliner
Reattach the backrest, seat cushion, and any other components you removed in the disassembly step. Secure them in their original positions.
Check the functionality of the recliner to ensure it still operates smoothly.
Step 7: Finishing Touches
Trim any excess fabric, and conceal the staples or tacks if necessary.
If desired, add decorative trim or buttons to enhance the aesthetics of your newly upholstered recliner.
Step 8: Care and Maintenance
Carefully vacuum the recliner to remove any loose fabric fibers or debris.
Follow proper care and maintenance guidelines to keep your reupholstered wingback recliner looking its best.
Reupholstering Wingback Recliner: Diagram

Tips for Maintaining the Newly Reupholstered Recliner
Dust and debris can accumulate on the surface of your recliner over time. Use a soft brush attachment on your vacuum cleaner to gently remove these particles regularly.
If your recliner has removable cushions, periodically fluff and rotate them to ensure even wear. This can help prevent lumps and sagging.
Prolonged exposure to direct sunlight can cause fabric and colors to fade. Position your recliner away from direct sunlight or use curtains and blinds to protect it.
If you have pets, consider using a pet-friendly furniture cover to protect your recliner from scratches, fur, and accidents. Regularly vacuum pet hair and clean any stains promptly.
Conclusion
Reupholstering a wingback recliner is a creative and rewarding endeavor that breathes new life into a cherished piece of furniture.
It’s an opportunity to not only extend the life of your recliner but also to customize it to your unique style preferences.
This DIY project combines practicality with the joy of a hands-on creative journey. With the right tools, materials, and guidance, you can embark on this project with confidence, knowing that you’ll soon have a beautifully refreshed wingback recliner that adds charm and character to your living space.
Frequently Asked Questions
What tools and materials will I need for reupholstering my recliner?
You will need tools like a staple gun, scissors, screwdrivers, and pliers, as well as materials such as upholstery fabric, foam padding, batting, and possibly sewing equipment if you plan to make custom covers.
What care and maintenance steps should I follow after reupholstering my wingback recliner?
Regular vacuuming, spot cleaning, and protecting the recliner from direct sunlight are important for maintaining the upholstery’s appearance. Follow the care guidelines for your specific fabric type.
What tools and materials will I need for reupholstering my recliner?
You will need tools like a staple gun, scissors, screwdrivers, and pliers, as well as materials such as upholstery fabric, foam padding, batting, and possibly sewing equipment if you plan to make custom covers.
